At one time is was thought that you could not convert from one layer type to another. That is untrue. It is possible to convert a layer between the three different types: gradient, solid, or image. When you change the layer type, all keyframes and their settings are retained. This means, for example, that you can do a lot of the initial development work with a solid color layer. Add all of the necessary keyframes and then set the pan and size settings for each keyframe. Use a duplicate of this layer as a layer mask. The duplicate retains all of the settings just made. Now, make it a mask (the duplicate layer is now masking the original solid layer). Finally copy the image layer onto the slide. Use the image layer to convert the masked layer to an image. After the conversion, delete the image. The result: an image masked by a solid layer and both will have the exact same keyframes and settings. Fast, efficient, easy!

CREATING THE LAYER CONVERSION

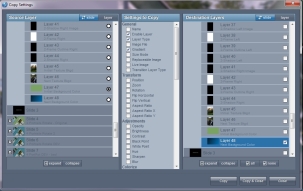
To make the change, you need a source layer and a destination layer. The source and destination layers may be on any slide. Right click on the layer that you want to copy. A menu will appear (see Figure 1). Hover over the Copy option. A set of copy options will appear; click on Copy Settings. This opens the Copy Settings dialog (see to figure 2) which has 3 columns: Source Layer, Settings to Copy, and Destination Layers. The source layer is selected. In the Destination Layers section, click on the “+” for the slide on which you’ll copy layer settings to. Next, select the layer that will accept the changes.


Now, let’s assume that the source layer is a gradient that is colored bright red to dark red and the destination layer is a white solid layer. In the Settings to Copy column, select Gradient under the General Section. When you do that, Enable Layer and Image Type are also selected. Now click on Copy & Close. You are done. If you look at the layer on the slide to which you just copied the settings to, you should see that it is no longer a white solid layer. Instead, it is now a gradient layer that is colored bright red to dark red.
What is really nice about this is that you can convert a one layer type to another. That’s really nice and can prove very handy at times. Further, you can convert multiple layers at the same time.
AN EXAMPLE CONVERSION
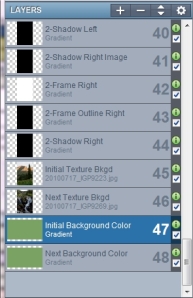
In this example, I want to convert the blue gradient to the same color as the green gradient (see Figure 3). But, I don’t want to mess with the color settings. The easy way is to just copy the green gradient onto the blue gradient using copy settings.
The Green Gradient is selected as the Source layer (in the Copy Settings Dialog, see Figure 2). In the Settings to Copy, under the General section, the following are selected: Enable layer, Layer Type, and Gradient (selecting Gradient will automatically select the other 2).
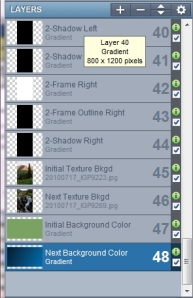
In the Destination Layers column, I’ve expanded the slide containing the layer I want the settings copied to and I’ve selected the Blue gradient layer. Finally, I select Copy & Close. The Setting copied graphic (see Figure 4) shows the result of what was just done. Note that the last layer is now no longer blue.
Copyright © 130129-1945, Dale Fenimore, FPVP LLC
140525-0925